Thursday, May 12, 2011

BPT testing process on SAP ECC application

Automation of a SAP ECC application is quite easy then any other application if you have the correct add-in installed in your machine and server. Because here we could create a BPT component for each T-code and the make a test scenario to add different component in our test case.


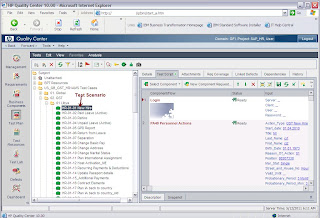
Below is some screen shot for the process through QC:


Below is the screen for how to create test scenario with Business Components:


Below is screen how to run the test scenario from test lab:


Adding new Parameter in existing component for BPT process

In BPT process, never ever add any parameter with default data for any existing components. Because this might cause very bad effect on your other scenario what you are using presently. If you really want to add some parameter in your existing component then after adding the parameter delete the parameter value and save the component (i.e. save the component with new parameter with blank value). Always verify this should not cause any problem to the other scenario of your other test suite.

By mistake if you add the parameter with default value and save then delete the parameter field from your component and save. And again add the parameter with blank value and save.

Friday, February 12, 2010

BPT testing for SAP Applications

BPT testing for SAP modules: I think this is one of the most complex test environments with BPT and SAP application. Well, every thing make us easy if we had a proper planning and system environment in order to start a new project for automation.
Check list (In Order) for set up the automation test environment:
1. QTP installation
2. QC Installation
3. SAP GUI installation & SAP environment configuration
4. SAP Add In
5. QC – QTP connectivity set up.


Now, you are done with the system configuration.
As we know that, SAP application will be quite complex environment to automate if the automator is not aware about the subject of SAP functionality. Basically, SAP is transaction depended ERP module. It has lots of sub fields (like Material Management, Sales etc.) and transactions.
Talk about BPT: Business Process Testing is the way to test the application against the business module created in Quality Center. Here we also have the option to create Business module through QTP tool. The other option is to create through QC and then create the script in QTP and save in QC data base.

Tuesday, August 25, 2009

Limitations of QTP

Limitations to display on QTP Print log window:

We are familiar with Print command in VB Script that is use to display the output lines in Print Log window. This is very similar to printf in C++ and System.out.print commands in Java.

Syntax: Print “text”

QTP Print log (Quick Test Print Log) window can write 1001 lines on it and 1024 characters in a line. So it has array of (1001 X 1024). If you enter more lines the previous lines will be deleted and most recent lines will be displayed. So it can handle 1001*1024= 1,025,024 characters to display at a time.


Limitations to Display on QTP Message dialog window:

We also very much familiar with Msgbox command in VB Script that is use to display output message in Message Dialog Window with ok button.

Syntax: Msgbox “text”

The maximum length of characters Prompt is exactly 1023 characters. But it might depend also on the width of the characters used. If Prompt consists of more than one line, you can separate the lines using a carriage return character (Chr(13)), a line feed character (Chr(10)), or a carriage return/linefeed character combination (Chr(13) & Chr(10)) between each line.

This has been tested with the following code:

Dim Num
Num=RanNumber(1023)
print Num
msgbox Num

Function RanNumber(val)
Dim d
Set d=nothing
Set d = createobject("Scripting.Dictionary")
For i =1 to val
r=RandomNumber (0,9)
d.add i, r
Next
a = d.items 'Get the items.
For i = 0 To d.Count -1 ' Iterate the array.
s = s&a(i)'Create return string.
Next
RanNumber=s
End Function


Tuesday, August 18, 2009

Mercury QuickTest Professional Shortcut Key Reference Card

Mercury QuickTest Professional Shortcut Key Reference Card

File Menu

New > Test CTRL + N
New > Business Component CTRL + SHIFT + N
New > Scripted Component ALT + SHIFT + N
New > Application Area CTRL +Alt + N
Open > Test CTRL + O
Open > Business Component CTRL + SHIFT + O
Open > Application Area CTRL + ALT + O
Save CTRL + S
Export Test to Zip File CTRL + ALT + S
Import Test from Zip File CTRL + ALT + I
Print CTRL + P

Edit Menu

Cut CTRL + X (EV only)
Copy CTRL + C
Paste CTRL + V
Delete DEL
Undo CTRL + Z (EV only)
Redo CTRL + Y (EV only)
Rename Action F2
Find CTRL + F (EV only)
Replace CTRL + H (EV only)
Go To CTRL + G (EV only)
Bookmarks CTRL + B (EV only)
Complete Word CTRL + Space (EV only)
Argument Info CTRL + SHIFT + SPACE (EV only)
Apply “With” To Script CTRL + W (EV only)
Remove “With” Statements CTRL + SHIFT + W (EV only)

Insert Menu

Checkpoint > StandardCheckpoint F12
Output Value > Standard Output Value CTRL + F12
Step > Step Generator F7
New Step F8 OR INS (KV only)
New Step After Block SHIFT + F8 (KV only)
Key: KV = Keyword View
EV = Expert View

Test/Component/Application Area Menu

Record F3
Run F5
Stop F4
Analog Recording CTRL + SHIFT + F4
Low Level Recording CTRL + SHIFT + F3
Step Menu
Object Properties CTRL + ENTER
Value Configuration Options CTRL + F11 on an input value
(KV only)
Output Options CTRL + F11 on an output value
(KV only)

Debug Menu

Pause PAUSE
Step Into F11
Step Over F10
Step Out SHIFT + F11
Insert/Remove Breakpoint F9
Clear All Breakpoints CTRL + SHIFT + F9

Data Table Options

Edit > Cut CTRL + X
Edit > Copy CTRL + C
Edit > Paste CTRL + V
Edit > Clear > Contents CTRL + DEL
Edit > Insert CTRL + I
Edit > Delete CTRL + K
Edit > Fill Right CTRL + R
Edit > Fill Down CTRL + D
Edit > Find CTRL + F
Edit > Replace CTRL + H
Data > Recalc F9
Insert Multi-line Value CTRL + F2 while editing cell
Activate next/previous sheet CTRL + PAGEUP/CTRL + PAGEDOWN

General Options

View Keyword View/Expert View CTRL + TAB
Open context menu for step or Data Table cell SHIFT + F10
or Application key ( )
Expand all branches * [on numeric keypad] (KV only)
Expand branch + [on numeric keypad] (KV only)
Collapse branch - [on numeric keypad] (KV only)


Here is a QTP References Card from Bas M. Dam

Friday, July 24, 2009

How to create a VBA Function Library for Use in VBScript/QTP

Creating a VBA Function Library for Use in VBScript/QTP:
1. Open your MS Excel Sheet.

2. Open a Module to write a VBA function. To open open Visual Basic Editor mudule folow this: Click ‘Tools => Macro => Visual Basic Editor
(This could be different for different version of MS Excel)

3. Insert => Module


4. Write your functions in the module


5. Save your excel work book in a folder with suitable name(for example: C:\Joli.xls), you need to provide this path to your qtp script.

6. Write the code in QTP to use your VBA functions

‘Create Excel application Object
‘Use Run method of application to run the function
‘Run (“’Path of excel file’!Modulename.Function Name”,”i/p Arguments”,”i/p arguments”)

Thursday, July 16, 2009

Class Use in VB Scripts

Class Use in VB Scripts:
Here is the basic example of creating a Class. Class ‘Student’ has been created to define the properties of a student. Then created a new instance (objStudent) to use this class definitation. This is a very basic example of Class. Following this class concept, you will be able to write any complex script using class.

Class Student
'In the declaration section of the Student class module
Public StudentID
Public FirstName
Public LastName
Public MajorCode
Public YearLevel
Public BirthDate

End Class

'Declare an object Student
Dim objStudent

'Create an instance of the class
Set objStudent = New Student
On Error Resume Next

'Use the object Student
objStudent.StudentID = "12345" '& CLng(2)
'Err.Raise 6
MsgBox ("Error # " & CStr(Err.Number) & " " & Err.Description)
Err.Clear
On Error GoTo 0
objStudent.FirstName = "Cathrina" '& CStr(lngCount)
objStudent.LastName = "Aniversario" '& CStr(lngCount)
objStudent.MajorCode = "C" '& CStr(lngCount)
objStudent.YearLevel = "Freshmen"' & CStr(lngCount)
objStudent.BirthDate = "Oct 10, 1980"' & CDate(lngCount)

MsgBox "Student ID : " & objStudent.StudentID & vbCrLf & _
"Student Name : " & objStudent.FirstName & " " & _
objStudent.LastName & vbCrLf & _
"Major Code : " & objStudent.MajorCode & vbCrLf & _
"Year : " & objStudent.YearLevel & vbCrLf & _
"BirthDate : " & objStudent.BirthDate

Set objStudent = Nothing